How to Paint an Outdoor Shed

How to paint and outdoor shed, one of the many question we get asked around the spring time of year. As the summer approaches, we often look towards outdoor jobs and one of the most popular options is painting the exterior shed.

Its important to consider the cost benefits of painting a shed. Painting an outdoor shed has several benefits, including:

  1. Protection from the elements: Exterior paint acts as a barrier that protects the shed from moisture, sun, wind, and other elements, helping to prolong its life.
  2. Increased curb appeal: A fresh coat of paint can make an old, drab shed look brand new, adding to the overall aesthetic of your property and increasing curb appeal.
  3. Improved durability: Exterior paint helps to seal cracks and prevent further damage to the shed, making it more durable and longer-lasting.
  4. Protection from rot and insects: Some exterior paints contain fungicides and insecticides that help protect the shed from rot and insect damage, further increasing its longevity.
  5. Personalisation: Painting your shed allows you to choose a color that complements your home or garden, personalising it to your taste and adding a touch of your own style.

Overall, painting an outdoor shed is a simple and affordable way to improve its appearance and protect it from the elements, extending its life and enhancing your property.

Materials Required to Paint a Shed

Materials:

  • Primer specifically formulated for exterior use
  • Exterior paint in the color of your choice
  • Paint brushes or rollers
  • Paint tray
  • Drop cloths or plastic sheets
  • Sandpaper (if the surface is rough)

How to Paint an Outdoor Shed Step by Step

  1. Clean and prepare the surface: Remove any loose or flaking paint, and clean the surface of dirt, dust, and debris. Sand rough areas to create a smooth surface.
  2. Apply primer: Priming helps the paint adhere better and increases its durability. Follow the instructions on the primer can and apply one even coat with a brush or roller. Allow to dry completely.
  3. Apply paint: Using a brush or roller, apply one or two coats of exterior paint, following the instructions on the paint can. Allow each coat to dry completely before applying the next.
  4. Clean up: Clean your brushes and rollers with warm soapy water and let them dry completely.

Note: Always follow the manufacturer’s instructions for the primer and paint you use, and wear appropriate safety gear, such as a mask and gloves, during the painting process.


How to Choose Bathroom Floor Tiles

Why Update Your Bathroom Floor Tiles

There are several reasons to update bathroom tiles, including:

  1. Aesthetic improvement: Bathroom tiles can become dated and unattractive over time, and replacing them can give the room a fresh, modern look.

  2. Increased value: Updating bathroom tiles can increase the value of your property, making it more appealing to potential buyers if you plan to sell in the future.

  3. Improved functionality: New tiles can be more durable, slip-resistant, and easier to clean than older, worn tiles, making your bathroom safer and more functional.

  4. Water damage prevention: Older tiles can crack and allow water to seep behind the walls, causing mold and mildew to grow. Updating the tiles can prevent water damage and improve the overall health and safety of your bathroom.

  5. Personalisation: Replacing bathroom tiles allows you to choose from a wide variety of styles, colors, and materials to create a personalised look that reflects your taste and style.

In conclusion, updating bathroom tiles can have a positive impact on the appearance, value, functionality, health, and safety of your home, and is an investment that can pay off in the long term.


How to Choose Bathroom Floor Tiles

How to choose bathroom floor tiles is a question we regularly get asked when people are redecorating their homes.

Tiles are a popular option for bathroom floors and walls because they may add color, pattern, texture, a natural aesthetic, or even a little glitz. Using our advice, you’ll be able to choose the finest tiles for your bathroom.

Since every bathroom is unique and will accommodate all types of people and families, there is no “best” style of bathroom tile. This makes the question of ” How to Choose Bathroom Floor Tiles ” a little more complicated.

Bathrooms must allow the proper function for those who will use them. Before you start, consider who will be using the bathroom. For example, glazed or shiny floor tiles would not be appropriate if elderly or young children will be using the bathroom as these tiles can be quite slippy.


Consider the Following Factors

When choosing bathroom floor tiles, consider the following factors:

  1. Durability: Bathrooms are high-moisture areas, so choose tiles that are resistant to water and stains. Ceramic and porcelain tiles are both good options, as they are durable and easy to clean.

  2. Slip resistance: Bathroom floor tiles should have a slip-resistant surface to prevent accidents. Look for tiles with a matte finish or those specifically labeled as slip-resistant.

  3. Style: Bathroom floor tiles come in a wide variety of styles and colors, so you can choose a look that matches your decor. Popular options include natural stone, mosaic, and wood-look tiles.

  4. Size: Larger tiles can make a small bathroom feel more spacious, while smaller tiles can add visual interest.

  5. Maintenance: Some bathroom floor tile materials require more maintenance than others. Consider how much time and effort you are willing to put into cleaning and upkeep when making your selection.

  6. Budget: Bathroom floor tiles come in a range of prices, so consider your budget and choose a tile that fits within your price range.

Best of look choosing your bathroom floor tiles and remember to keep the above points in mind when choosing.


How to Paint a Fence

Learning how to paint a fence is a terrific way to give your outdoor space a new lease of life, whether you’re going to update your garden fence with a new paint colour or just want to freshen up its weather-worn surface. Your fence will look better for longer if you give it a fresh coat of exterior wood paint that is appropriate for the weather.

Thanks to The Paint Shack, you can now learn how to paint a fence like a pro with a little advice from our expert team. Let’s get going.

Because Irish weather can be unpredictable, it’s very important to check the forecast before planning a day of painting. The first rule of painting a fence is to wait until it’s nice and dry outside. This is due to the fact that the fence wood must be both dry and warm; otherwise, the paint may not adhere properly.

What you’ll need is as follows:

  •  Paint brushes and rollers
  • Safety goggles
  • Dust mask
  • Ladder
  • Pressure washer
  • Scrubbing brush
  • Paint sprayer

Getting Started

As this project calls for the use of some hand tools, it’s important that you are familiar with these tools before progressing. If not, ensure to get proper health and safety advice before proceeding.

We’ll recap on some of the basics now. When painting, put on old clothes and safety goggles, and when sanding, put on the proper gloves and a dust mask. If you need a step ladder, put on appropriate footwear and set it down on a level surface. If any fence paint gets on your skin or in your eyes, rinse right away.

Always make sure you have enough room to work by trimming or tying back any neighbouring plants and ensure proper access to the fence you wish to paint. To shield nearby grass and vegetation from hazardous paint splatters, cover them with plastic sheeting.

Checking, Clearing and Priming

Check your garden fence for any little cracks or missing panels before painting it. Clear the fence of any ornaments or hanging baskets and give it a good cleaning.

To clean out any dirt or debris from the fence surface, use a power hose. After that, sand it to remove any remaining wood splinters. Use a scrub brush if there are any remaining mold or dirt stains remaining.

Before painting your garden fence, apply a layer of wood primer to improve the outcome and lengthen its longevity. Before continuing, make sure the wood primer is thoroughly dried according to the manufacturer’s directions.

Get Painting

Pick a fence paint that is made especially for external use and has a robust, long-lasting formula. When it comes to painting a fence, there is no “one size fits all” solution. Use a roller, sprayer, brush, or a combination of all three to apply exterior paint.

To give it a smoother, more polished appearance when using a large brush, make sure to paint in the direction of the timber grain. To catch any drips, begin at the top and work your way down.

Make sure your selected paint is compatible if you wish to use a sprayer. Our in store team can help you with any questions you may have.

On a windy day, stay away from using a sprayer because the paint may end up in other parts of your garden. Keep a small brush close by for any touch-up work even if you decide to use a sprayer.

Time to Tidy

The majority of high-quality fence paints just need one coat. If you feel the need for a second, wait until the first has dried fully. After finishing, take off any temporary plant ties or canes that were utilised, as well as all plastic coverings from your plants and vegetation.

To keep your brushes in good condition for future use, wash them in warm, soapy water. White spirit could be required because outdoor wood paint is typically oil-based.

Before storing your fence paint and primer, make sure to properly label, tightly seal, and keep them out of direct sunlight and off the ground to prevent rust.

How to Paint a Timber Floor

How to Paint a Timber Floor

We often get asked how to paint a timber floor? As wear and tear prevails on our floors there comes a time for change. Follow our simple five-step guide for fabulous wooden flooring in your home.

Solid hardwood floors can be given new life by painting rather than repolishing them, which is more expensive and messy. Additionally, it can make your flooring a stunning design feature and stand out, especially if you paint them white. Painting hardwood floors requires time and patience, but if you follow these easy instructions, you’ll be a pro in no time.

Floor paint Essentials:

  • Brush Masking tape
  • Paint tray
  • Wood cleaner
  • Sander
  • Roller
  • Sponge or cloth
  • Vacuum cleaner

As with any paint project, it’s crucial to properly prepare the surface you’re working on to ensure a nice, even, long-lasting finish. When dealing with polished hardwood floors, you must first thoroughly clean them with a mop to get rid of any accumulated dirt and residue. After the floor has dried, you must sand it, but you won’t need to sand the floor down to bare wood for this particular project in order to get the finish you want.

Painting floors can be tricky, so it’s a good idea to remove as much furniture as possible from the room before starting.

Step 1: Sand

If your wooden floor has been varnished, you’ll need to lightly sand it to restore the surface’s porosity. Since there will be a lot of dust, this is a good time to sand your skirting as well because you should paint it after you paint the floor for the best results. Also if your floor has any cracks it’s a good idea to fill in any of those cracks with wood filler.

We recommend using 120 grit sandpaper on a hand-held electric sander so you can get the job done more efficiently and effectively. Alternatively, you could opt for an industrial sander which can be rented from local tool hire shops.

Step 2: Clean

The next step is to clean the area before painting. Using a degreaser wipe down the newly sanded surfaces to get rid of any traces of filth, dust, and grease, vacuum the floor and use. If your floors are relatively, you can use a simple wood floor cleaner. Allow the floor an hour to dry before painting.

Step 3: Masking the Area

Before painting, it’s a good idea to protect the other areas of the room such as walls or skirting boards. You can mask of these areas quickly and easily using masking tape. Make sure the area is dry before using tape to hide the skirting board’s floor-facing edge. Once you have the area masked off, you’re ready to start paining your wooden floors.

Step 4: Painting the Wooden Floor

You’re finally ready to paint your wooden floor. If the room has a lot of traffic such as a kitchen or living room, we’d recommend using a primer, undercoat and topcoat to get the best result. Once you’ve opened your paint, stir your paint thoroughly to ensure that the colour and consistency of the finish will look great. and if you’re using a roller for the first time, lightly mist it with water using a spray bottle. By doing this, you can increase paint absorption on the roller and eliminate fluff.

Using a brush, paint the floor’s edges, and then use a roller to cover the entire surface. Apply two coats, then check the drying periods on the can. More coats can be necessary if the colour shift is significant.

Step 5: Tidy up

Once your floor has dried, you’re ready to begin tidying up. Drying times are listed on the paint tin, giving a few extra drying hours can often be a good idea. Once your floor has fully dried, it’s time to remove the masking tape and then begin to move furniture back into the room.

How to Paint Kitchen Cabinets

How to Paint Kitchen Cabinets

One of our most common questions we get weekly is “How to paint kitchen cabinets? Today, we are going to take you step by step through the key step involved in getting to grips with this DIY project.

A complete kitchen remodel can be expensive and stressful, but if you like the design and your cabinets are in good shape, why not think about painting what you already have? Painting your kitchen cabinets can be an inexpensive way to bring life back into your kitchen. A simple paint, can breathe new life in to your kitchen, one of the busiest places in most households.

Painting your cabinets is a fantastic method to freshen up your kitchen because there are so many different colour schemes to pick from and variations between matt, gloss etc. If you undertake the work yourself, you might even have extra money to spend on new knobs, hinges or countertops. Often replacing these other items can give the appearance of a brand new kitchen.

Make sure to follow our step by step professional tips on how to paint kitchen cabinets correctly, we want you achieve the best result possible.

Start by researching the best paint options for your kitchen cabinets to guarantee your painting project is completed to a high standard. There are so many options available and remember, we can colour match any colour you see through our paint matching service.

What Type of Paint Latex or oil?

Some professionals have completely abandoned oil-based paintings as latex paints have improved substantially in recent years. Latex paints are easier to use than oil-based paints since they dry quickly and can be cleaned up with water. But many professionals continue to choose oil-based topcoats, claiming that they provide a tougher, more resilient paint layer and level out to a finished surface that is more uniform. The full curing time of latex paints is also lengthier (up to three weeks) than that of oil-based paints. They are susceptible to harm in the interim.

So in our view, both latex and oil will produce a high-quality finish. If you do decide to use latex paint, make sure it is a 100% acrylic formulation since these have better adhesion and durability than vinyl acrylic paints.

Spray paint or a brush?

The smoothest choice is a spray-on finish, but painting it well requires some practice. Additionally, you’ll probably need to rent the spray equipment, which raises your expenses, and you’ll need to take the time to mask off all of the kitchen’s potential spray targets, such as countertops, cabinet interiors, and appliances.

Due to these factors, we advise utilising high-quality brushes instead. Invest in a nice, 3- to 4-inch-wide square brush, whose straight ends will quickly cover large, flat panels, as well as a 2- to 3-inch-wide angled brush, which will enable you to coat door frames with paint in a single pass and get paint into the corners of doors with moulding. Oil-based paint should be applied with a natural-bristle brush whereas latex paint should be applied with a synthetic bristle brush that doesn’t absorb water.

What You’ll Need

Before you start painting your kitchen cabinet, you’ll need to get yourself organized. Some key items are listed below.

  • Degreasing detergent & cloth
  • Masking tape
  • Screwdriver or Cordless Drill
  • Paint stirrer
  • Paintbrush
  • Roller
  • Kitchen cupboard paint

Removing Doors

A simple kitchen improvement is painting the cabinets which can bring enormous pleasure to the heart of most households. Because horizontal painting is less likely to result in runs and drips, the specialists start by taking the doors off. To achieve this, simply detach at the hinges. Next start removing the doors. In some situations, you may not have enough space to remove the hinges completely due to lack space. In those situations, simply use masking tape to cover the hinges, making sure to hide all exposed metalwork and paint. You can of course paint each cabinet carefully without removing the doors.

Removing Handles

Carefully remove the drawer and cabinet handles with a screwdriver, then set them aside. But always take the handles or knobs off each door or drawer. A cordless screwdriver will expedite the process of removing the hinges and handles. Once you’ve removed the above, lay down newspaper or dust sheets to protect the floor. Now is a good time to consider whether you will replace or keep the old handles, knobs and hinges.

Prepping the Cabinets

Preparation is a key step so let’s not take any shortcuts here. Cleaning, although tedious, is necessary to get rid of accumulated kitchen dirt. Jif is a good wood cleaner or even just some washing up liquid. If the situation is particularly bad, use a specialised degreaser. Remember to let the cabinets dry for an hour before starting the next step.

There’s no need for a primer or topcoat for wooden cupboards. However, glossy cupboards will need a quick sand down with a fine grit sandpaper. The surface should then be sanded lightly to aid paint adhesion. It only requires a light coating of sand, so use a paper with a granularity of 150 to 250. Achieve an even, matte surface; there’s no need to go overboard. After that, use a moist cloth to remove the dust and let it air dry entirely.

Preparation is a key step so let’s not take any shortcuts here. Cleaning, although tedious, is necessary to get rid of accumulated.

Protect Walls & Floors

To protect the walls and any surfaces you don’t want painted, run masking tape down the edges of the cabinets. It will also assist in producing a sharp edge. To catch paint drips, place a sheet over the work surfaces, floors, and appliances.

Start Painting

To guarantee an even and complete paint covering, start by using a brush to get into any crevices or difficult-to-reach spots.

Then, use a roller with a short handle to paint the remaining surfaces of the cabinets and drawers. Most paints dry in about 1-2 hours but check the back of your paint tin to be sure.

Enjoy your New Kitchen

Now that the hard work is completed, it’s time to put your cabinets back together. Reattach the handles and doors after the masking tape has been entirely removed. Why not swap out the outdated handles for brand-new ones if you’re looking for a comprehensive renovation.

How to Get Paint Off Clothes

How to Get Paint Off Clothes

Painting comes with small challenges and no matter how careful we are, we often find ourselves in situations where we have somehow gotten some paint on our clothes. The question is how do we get the paint off clothes?

An unexpected paint stain on garments is a regular side effect of any home design effort, whether you’ve recently changed houses or are simply updating the walls of your bedroom. Fortunately, we have some excellent advice on how to get paint stains out of clothes, so even if you accidentally splattered Midnight Blue all over your favourite T-shirt, everything you need to know about removing the stain is below! The first thing to establish is what type of paint you’ve gotten on our clothes.

The most crucial thing to look for when dealing with a gloss or emulsion paint stain on clothing is whether the paint is oil- or water-based. Water-based gloss paints are common, although this is not a guarantee. Oil-based paint stains will take a bit more effort to remove than water-based paint stains, however you can still use the same general idea to remove them.

Check the paint can first, as it should include detailed instructions on how to remove paint stains brought should an accident occur. If not, keep reading to learn how to get paint out of clothes.

  1. Act quickly because these stains normally come out easier when they are moist. If you can, take the clothing off; otherwise, keep the stain damp until you can proceed to the next step.

  2. The stain should be treated using paint remover. If gloss or acrylic based you can also try nail varnish remover or hairspray as an emergence option. Lay the stained side of the fabric down on a piece of kitchen paper or a rag before dabbing it with a cloth dipped in paint thinner or paint remover. Use the paint remover specified on the paint tin if it is recommended. If everything else fails, you can attempt to remove paint stains from clothing with turpentine or white spirits. Always read the care label on the clothing first because some synthetic fabrics, like rayon, won’t hold up to substances like turpentine.

  3. Apply a detergent liquid such as Vanish or any detergent liquid and let soak before treating. Check the care label once more and rub the liquid on the stain before soaking it for many hours or overnight in the hottest water you can find. Check the washing instruction on the garment to determine the max temperature to soak in. If in doubt, just use luke warm water.

  4. As usual, wash. Prior to putting the item in the washing machine at the maximum temperature recommended on the garment care label, pre-treat the stain once more with detergent.

Finally, cross your fingers and hope that your stain is gone.

How to Paint a Room

How to Paint a Room

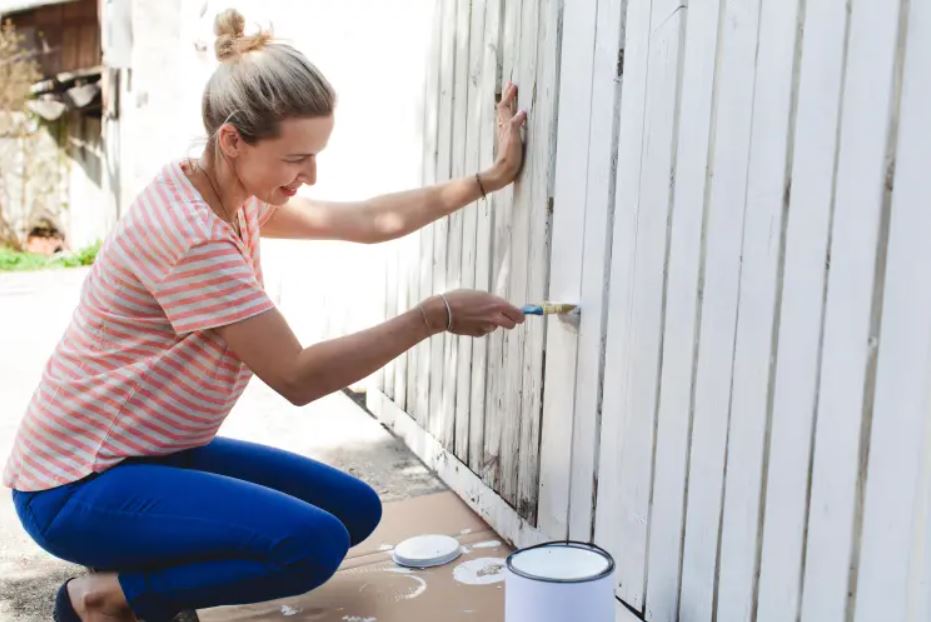
So your walls need a little love and affection, we get it. Paint that is dull, lifeless and flaky simply does not bring happiness to any situation. Luckily, here at The Paint Shack, we specialise in happiness and we’re happy to help you get the colour you desire for your room. Remember we can match any colour you find through our unique free colour matching service.

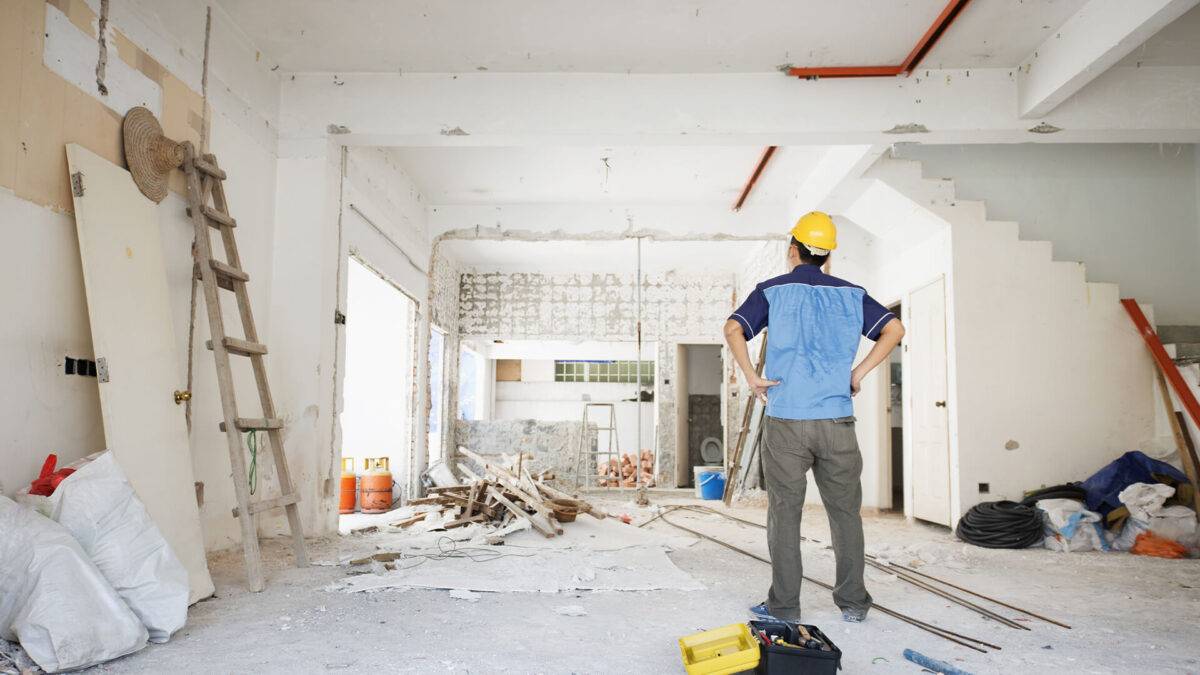
So if you have been putting your room painting off, we’ve put this article together just to help you get started on your colourful journey. Below is some general advice for painting a room and getting a positive result from your project. Painting the walls is a frequent DIY project and a cheap method to upgrade the overall look and feel of your room. It’s also not too painful, as you can imagine the hardest part is getting started. One of the great things about painting a room is that if you make a mistake, it’s never very difficult to fix the error.

Even if painting a room is simple to perform, you still need to have a strategy. It’s useless to carelessly grasp a brush and start applying paint to it. Everything depends on the final touch and the process is key. It will take some concentration on your part to get your new room perfectly perfect without making a mess. Fortunately, following our step-by-step painting instructions is very simple and by the end of the day we’re sure you’ll be please with your efforts.

Below is the Paint Shacks guide on how to paint a room. Follow each step carefully.
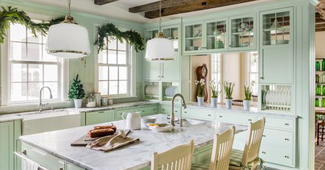
Picking Colours

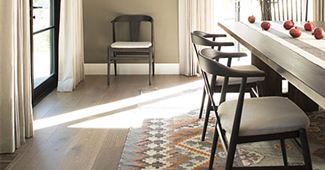
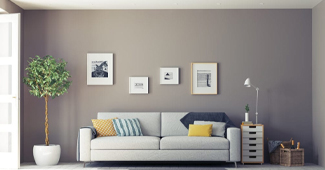
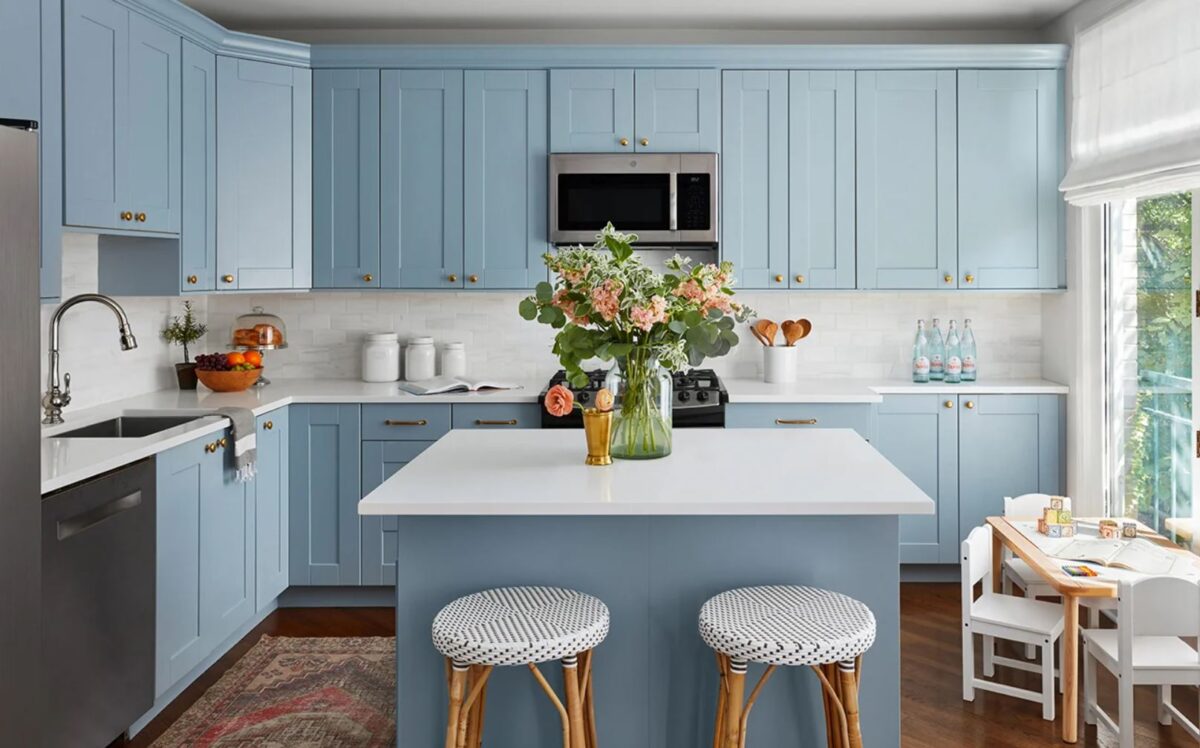
Unsure about the best paint colours for a particular room? We like to think of each household as a flow of design or colour with certain themes or colours connecting each room of your house. Unfortunately, this is one area many people overlook, so take a step back and think a little about your overall house design goals and where this room fits in.

For instance, do you adore vibrant colours or do you favour more muted options? Taking into account your furniture and any art is also helpful. Before making a final decision, you can choose a few colours and purchase swatches to get a feel for the room. If you’re near our store, pop in and review some of our swatch packs and get some advice on colours that could best work for your room. Keep in mind with any colour you choose, it will appear slightly different in shade at different points during the day so it’s important to do a test patch and see how it transforms throughout the day.

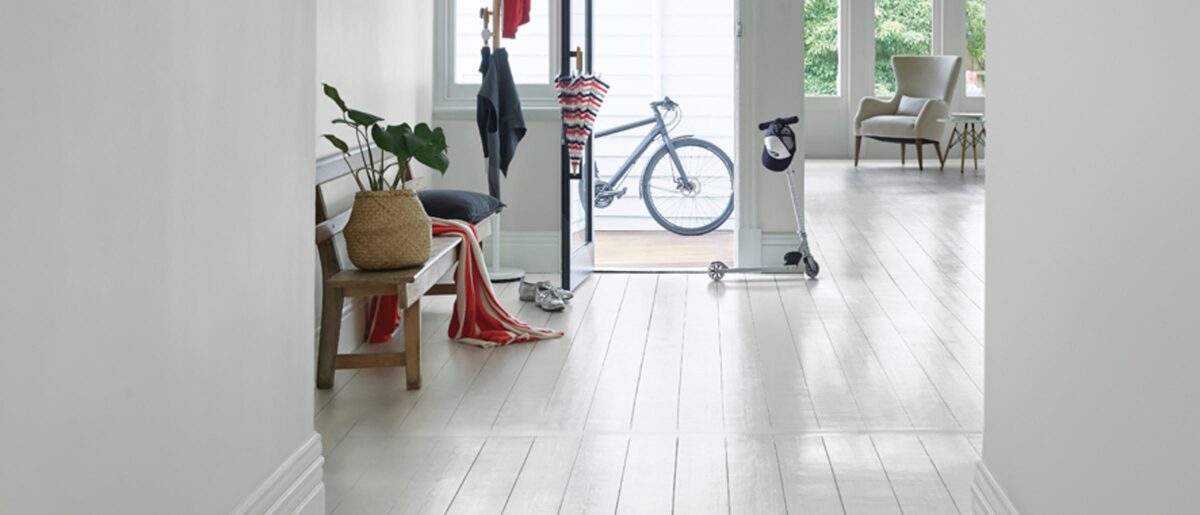
Are you considering also doing the ceiling? Why not stick with the same hue? This can avoid a jagged, unfinished appearance. Additionally fantastic for hiding faults for a pristine finish, our Flat Matt. Contrarily, Soft Sheen is stain-resistant and simple to clean.

Getting Organised

For each 10 m2 of wall, you need about one litre of paint (or ceiling). What on earth does that mean? Check out our paint coverage calculator located on each product page on our website; all you need to do is enter the details of the room type. If the surface you’ll be decorating has a lot of texture, don’t forget to get enough paint for two coats plus extra. Additionally, ensure you’re using good quality tools such as brushes, roller covers and handles, paint trays, masking tape, and sheets. Did you know for example some rollers are designed for painting outdoor walls and others indoor walls and the finishes can be different? If you need advice, our team at The Paint Shack are always ready to offer advice and assistance.

An excellent brush size for cutting in and less delicate tasks is two inches. With window frames and trim, 1 inch will make it easier to reach those awkward areas. For various paint tasks, there are several brush shapes as well. An angled sash brush is quite helpful for navigating switches and tight corners.

You’ll need a roller in addition to a good set of brushes. These help stay clear of paint drips, streaks, and patches. Additionally, rollers offer the quickest method for applying paint to walls. Even the broadest paintbrush would take longer to traverse the space.

Getting Prepped

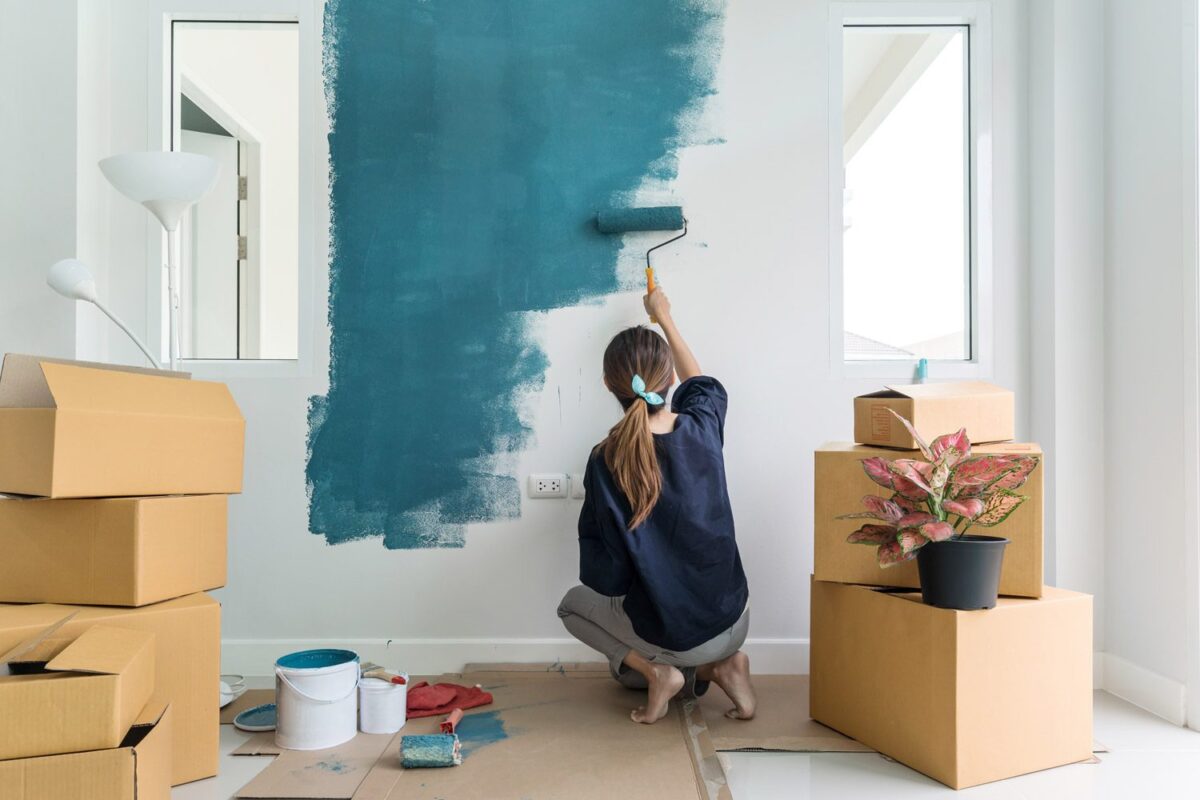
If you’ve never painted a room before, then the most important thing is your preparation. Preparation is usually the first step. Walls, ceilings, or woodwork all must be prepped before proceeding with your project. Walls must be clean since grease splotches or dust can prevent your new coat of paint from adhering correctly. This will also help prevent flaking of the paint or plaster. Do not forget that doing a poor job will require you to redo it a lot sooner than you anticipate so it’s best to get it right first time. So, before you even open that tin, be sure to follow the steps below. Start your project by covering the floors and the furnishings with sheets or paint protective clothes.

As you clean and prep your room, keep an eye out for any scratches or holes. To ensure a clean smooth finish these can be filled using either poly filler or wood filler. Then after the filler has dried, sanded and finally painted. It’s a good idea to do a quick check in the room for old picture holes or cracks along the wall which will benefit from being filled.

Additionally, you’ll need to give the wall a quick sanding with a finer grit of sandpaper. After that, give everything a good brushing to remove any dust. The walls can be washed with soap and water to that final dust and dirt removed. But before putting paint on your brush, make sure the walls are completely dry after the washing. As we previously stated, a little preparation is essential for great to achieving a beautiful finishing wall.

Work from the Top

Using the celling as a starting point is a crucial step in any painting project, generally it’s the celling first and then the walls. Even with the best of intentions and highest quality paint, the roller can still leave a slight mist on the walls, so it makes sense to start painting here. It’s not the end of the world if you also touch the roller to the wall because you’ll be repainting the wall in the next step. Open the windows if it isn’t raining outside as this will release fumes and speed up the drying time.

Now that the preparation is over, you can start by stirring your paint with a wooden spoon or a stirrer. Grab a paintbrush and pour a small amount into a bucket. Paint a 3-inch strip around the corners of the ceiling to create a cut-in. To prevent them from getting covered in paint, any ceiling lights will also need to be painted around and carefully masked using masking tape or newspaper. After that, you can load your roller and fill your tray. Once your ceiling is covered, start in a corner and go outward in a W-shaped pattern. Once the first coat has dried fully, continue the technique with the second coat if you want an even layer of coverage and to avoid tidal markings.

Even though we mentioned you could complete this task in a single day, you can still store rollers and brushes in a way that keeps them from drying out if you run out of time. Just place them in the refrigerator after wrapping them in a towel or cloth. Just keep in mind to take them out 30 minutes before using them again.

Now the Walls

Once the ceiling is entirely dry, just begin working on your walls. Light switch covers and plug socket covers typically just require a few screws to be carefully removed. Be safe when working with the electrics. Alternatively, you can use masking tape and mask off the edges and paint carefully around. Now, work in pieces and paint one wall at a time, moving from left to right for example.

Paint the problematic areas, including corners, sockets, and connections at ceilings, skirting boards, and doors, using a brush to outline a border (cut in). Use a roller to complete the rest by rolling long, thick strokes in a W motion from top to bottom after you’ve edged an area. You should normally apply two coats of paint.


The Skirting Boards

Start working on the skirting boards once the walls have dried. Using a brush or small roller, paint these (or both). For the purpose of preserving the freshly painted walls, run decorative tape around the top of the skirting boards (obviously once the paint is dry). To achieve a smooth finish, use a lot of paint and long strokes. Apply two coats for a durable job properly done. Since gloss paint is no longer in style, Eggshell Wood and Metal paint will provide a modern, flatter surface that is unbreakable.

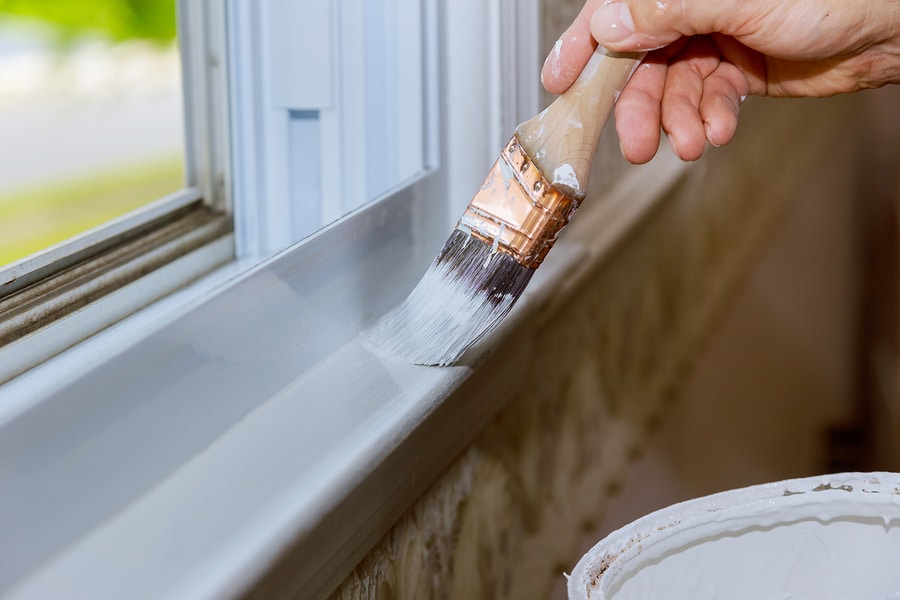
Finishing with the Doors and Windows

With frames, preparation is quite crucial; presumably, you did this in step 2. (sanding down any rough bits and filling in holes). Make sure the seal between the paint and the glass is intact on windows. It will prevent any rotting and the entry of moisture. Again, you should mask of areas of the window to make the painting easier.

A roller and brush are needed for doors. Do the panels first if the door has them. The nicest finish will be achieved on the bigger flat parts if you paint the outline of the panels with a brush first and then fill them in, if you’d like. Keep an eye out for any stray drips coming from the corners of door panels; they are unsightly.

This should now see you having painted the main elements in a room. We hope you are trilled with your new colour.

Paint UPVC Window Frames

Can you Paint UPVC Window Frames

Can you paint UPVC window frames? This is a frequent query we receive from consumers. Yes, you can paint UPVC windows and doors. For many house owners, adding a new paint colour for that extra curb appeal is a quick method to renew the exterior of their home. Painting UPVC windows is an enduring task which takes time. While not for the faint hearted of DIYers it is completely doable.

Am I restricted in Colours?

The answer to the question “what colour can I paint my UPVC windows?” is any colour you like. The decision you make about the colour of your windows is entirely up to you. Choosing paints that can attach effectively to plastic surfaces is crucial. You must pick a substance that can acehive this chemically because several paint types are not suitable for plastic. Additionally, to ensure that the colour lasts longer, we advise choosing a paint that can tolerate UV rays and resist solar bleaching. This is particurarly true during the summer months.

How do I paint PVC Window Frames

Another common question people often ask is whether it is possible to spray paint UPVC windows? Spray painting is the finest method for recolouring UPVC windows. Professionals all around the Ireland use window spraying as its considered the best method for painting UPVC windows. By using a sprayer instead of a brush, you may create a smooth, professional finish and prevent streaks and other markings that come from brush painting. However, painting UPVC windows is not a simple task, so if you want a professional result, be careful and take our recommendations to heart.

Apply Protective Covers: The first step is to cover the exterior of your home and the glass of your windows with protective coverings. This will safeguard your assets and guarantee that you only paint the UPVC window frames and not the rest of your home at the same time.

Clean all Windows: Make sure to give all window and door frames a thorough cleaning and to remove all debris, dust, and dirt. This will make sure that nothing might prevent the paint from properly adhering to the surface and change the smooth effect.

Get Sanding: After properly cleaning all windows, the following step is to lightly sand them in order to create a surface that is slightly abrasive. By doing this, you can make sure that the paint will stick to the surface better and provide a finish that is smooth and uniform.

Apply a Layer of Primer: Applying a layer of primer to your windows’ surface before painting them will make it easier for the paint to adhere to the surface and produce a higher-quality finish.

Spray painting windows can start when the surface has been thoroughly cleaned and prepared. As a minimum, three layers of paint should be applied to the UPVC, but depending on the colour you choose, it can take more to ensure that your windows are properly covered.

Allow the Paint to Dry: After spray painting your windows, you should give them around 30 minutes to dry. Then, check your windows to make sure that a flawless finish and a layer of colour-coordinated paint have been applied.

How to Paint a Celling

How to Paint a Celling

So you have decided to update your home and you’re wondering just how to paint a celing. We understand that the prospect of painting the ceiling can be daunting. But for a freshly painted space to look finished, it’s a vital step. Use these suggestions to do the task quickly and effectively while making sure the procedure is as simple and painless as possible. Here’s how to paint a ceiling properly, from choosing the necessary supplies to using the perfect method.

Paint the Celling First

Everyone has the same query: Which should be painted first, the ceiling or the walls? Start painting the ceiling if you intend to paint the entire space. In this manner, you won’t have to worry about roller splatters landing on the walls because everything will be touched up after the walls are painted. One warning: Be careful not to paint the walls if you’re painting the ceiling a strikingly different colour from the walls. Tape off any moulding.

Use Tape

Start by tape off the wall or crown moulding edge if you’re only painting the ceiling. If you want to get the roller close to the corner without getting paint on the wall, think about using a larger painter’s tape. This enables you to work more quickly by allowing you to be less precise.

Don’t forget to cover ceiling fans and tape any light fittings or vents.

Cover Everything

The clean-up process after painting might sometimes take longer than the actual painting. Save yourself the bother by clearing the room of as much furniture as you can, then covering the remaining pieces with plastic tarps.

Paint the Perimeter

Similar to painting a wall, you should begin by “cutting in,” or painting the ceiling’s edge with a paintbrush. Start at the edge of the ceiling and paint a few inches into it with a 2- to 3-inch brush. When you use a roller to paint the rest of the ceiling, you’ll want to feather the strokes so the edge blends in perfectly. If you intend to paint both the walls and the ceiling, skip the painter’s tape and start cutting in on the walls and ceiling as you circle the space.

Make sure you’re using the right ladder for the height of the ceiling to make cutting in easier. Struggling to reach is not only risky, but it will probably leave your muscles sore the next day. Instead of trying to bring the entire can, which would be heavy and dangerous if it spilled, pour some paint into a small bucket to store at the top of the ladder.

It could be time to employ a professional painter if you have exceptionally high ceilings that are difficult for you to comfortably reach with a ladder.

Use a Roller

For smooth ceilings, a low-nap roller works well; for textured ceilings, try a 3/4-inch nap roller. When you’re shopping for supplies, keep the ceiling height in mind and get the shortest roller extension pole that allows you to reach comfortably. Getting too long of an extension pole means you’ll be carrying more weight than is necessary.

Roll into the paint, and then use the textured side of the paint tray to roll off any excess. It may seem that more paint would help get the job done faster, but it will cause more drips and splatters.

Starting in one corner of the ceiling, roll on the paint with overlapping strokes to create a smooth, uniform surface. Once the entire ceiling is done, allow the paint to dry for 30 minutes. Then check if the surface needs any touch-ups or a second coat.

Good luck and we hope you’ve enjoyed this article on ” How to Paint a Celling “.

Concrete Floor Paint

The good news is that with the concrete floor paint, you can change the colour of the concrete. If you want to quickly update your garage, patio, or basement, painting the concrete floor can be a great do-it-yourself project. Concrete painting is simpler than you may imagine, and it’s a terrific project for adding a little unexpected flair to drab, grey concrete or cement surfaces.


When painting concrete floors, there are a few important factors to consider, such as the type of paint you choose and the final appearance you desire. The next section goes over the most important things you need to know about painting concrete floors in your home.

Painting or staining concrete to update it

Both paint and stain provide a quicker—and much more affordable—alternative to completely replacing the slab when updating a concrete surface (for example, a gallon of concrete paint will cost you around €50 versus about €600 or so for a new 10 foot × 10 foot slab).

So how do you choose between painting and staining concrete floors? What matters most is how you want to look in the end. Acid-based stains penetrate the concrete’s surface, providing longer-lasting coverage. Concrete is naturally porous, so if you don’t cover the top with a solid layer, you might see some streaks and unevenness.

Concrete can be stained, but painting it results in a more even, richly coloured finish. Durability is one area where it merely falls short. You should be prepared to deal with chips and peels over time and the necessity for touch-ups now and then, especially if you drive on the surface or subject it to a lot of foot traffic.

Both concrete paint and concrete stain, in the end, have benefits and drawbacks. However, painting will most likely be your best option if you’re looking for the most striking result.

Selecting the Right Concrete Floor Paint Type

The next step is to select the best kind of paint for the project if you’ve opted to use it.

Acrylic Latex or Epoxy are your two choices for concrete paint.

  • Acrylic Latex, is water based concrete paint which is easy to use. Most people feel fairly at ease using concrete paint. This is because it applies similarly to any other regular acrylic paint you may use at home.
  • Epoxy concrete paint is weather resistant, significantly more durable, and produces a more expensive-looking surface. This is why it is the most favoured option among professionals. That said, it is more difficult to work with than acrylic latex paint. This is because you must first mix the epoxy compound before you can begin painting. Despite this, working with epoxy is still simple enough for do-it-yourselves.

So how do you paint a concrete floor, thats a good question. To begin it is necessary to clean and prepare the surface, choose a suitable paint, and apply it using a roller or brush. Here is a quick overview of the process:

  1. Clean the floor thoroughly to remove any dirt, grease, or oil. A degreaser or TSP (trisodium phosphate) solution can be used to remove stubborn stains.
  2. Repair any cracks or holes in the concrete using a concrete patching compound. Allow the compound to dry according to the manufacturer’s instructions.
  3. Use a concrete etcher or acid wash to roughen the surface and create a better bond for the paint. Rinse the floor thoroughly with water and allow it to dry completely.
  4. Apply a concrete sealer or primer to the surface to help the paint adhere better. Follow the manufacturer’s instructions for drying time.
  5. Choose a paint that is suitable for concrete surfaces and has good durability. Epoxy or urethane paints are commonly used for concrete floors.
  6. Apply the paint using a roller or brush, following the manufacturer’s instructions. Allow the paint to dry completely before applying a second coat, if necessary.