


Learning how to paint a fence is a terrific way to give your outdoor space a new lease of life, whether you’re going to update your garden fence with a new paint colour or just want to freshen up its weather-worn surface. Your fence will look better for longer if you give it a fresh coat of exterior wood paint that is appropriate for the weather.
Thanks to The Paint Shack, you can now learn how to paint a fence like a pro with a little advice from our expert team. Let’s get going.
Because Irish weather can be unpredictable, it’s very important to check the forecast before planning a day of painting. The first rule of painting a fence is to wait until it’s nice and dry outside. This is due to the fact that the fence wood must be both dry and warm; otherwise, the paint may not adhere properly.
What you’ll need is as follows:
- Paint brushes and rollers
- Safety goggles
- Dust mask
- Ladder
- Pressure washer
- Scrubbing brush
- Paint sprayer
Getting Started
As this project calls for the use of some hand tools, it’s important that you are familiar with these tools before progressing. If not, ensure to get proper health and safety advice before proceeding.
We’ll recap on some of the basics now. When painting, put on old clothes and safety goggles, and when sanding, put on the proper gloves and a dust mask. If you need a step ladder, put on appropriate footwear and set it down on a level surface. If any fence paint gets on your skin or in your eyes, rinse right away.
Always make sure you have enough room to work by trimming or tying back any neighbouring plants and ensure proper access to the fence you wish to paint. To shield nearby grass and vegetation from hazardous paint splatters, cover them with plastic sheeting.
Checking, Clearing and Priming
Check your garden fence for any little cracks or missing panels before painting it. Clear the fence of any ornaments or hanging baskets and give it a good cleaning.
To clean out any dirt or debris from the fence surface, use a power hose. After that, sand it to remove any remaining wood splinters. Use a scrub brush if there are any remaining mold or dirt stains remaining.
Before painting your garden fence, apply a layer of wood primer to improve the outcome and lengthen its longevity. Before continuing, make sure the wood primer is thoroughly dried according to the manufacturer’s directions.
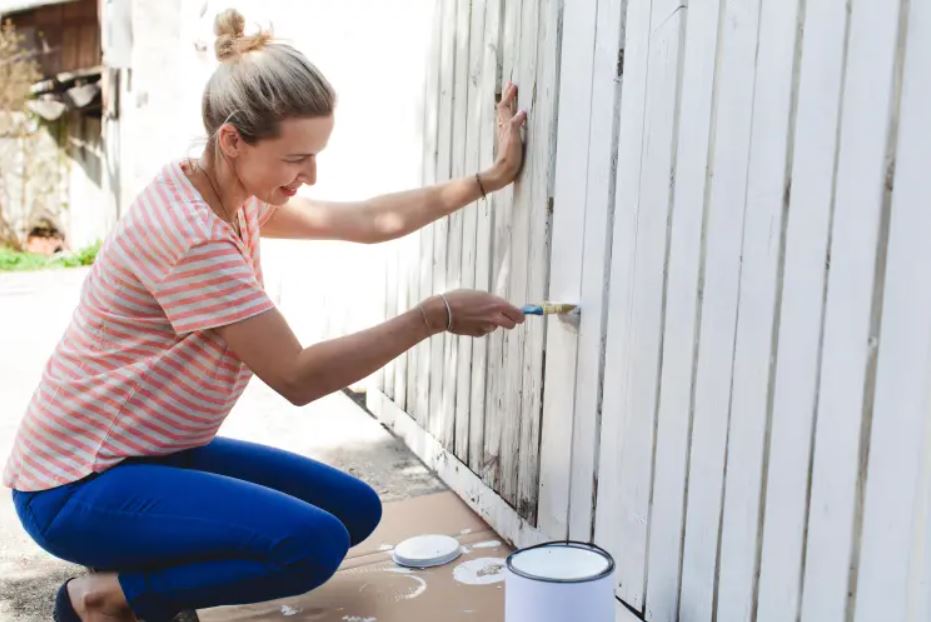
Get Painting
Pick a fence paint that is made especially for external use and has a robust, long-lasting formula. When it comes to painting a fence, there is no “one size fits all” solution. Use a roller, sprayer, brush, or a combination of all three to apply exterior paint.
To give it a smoother, more polished appearance when using a large brush, make sure to paint in the direction of the timber grain. To catch any drips, begin at the top and work your way down.
Make sure your selected paint is compatible if you wish to use a sprayer. Our in store team can help you with any questions you may have.
On a windy day, stay away from using a sprayer because the paint may end up in other parts of your garden. Keep a small brush close by for any touch-up work even if you decide to use a sprayer.
Time to Tidy
The majority of high-quality fence paints just need one coat. If you feel the need for a second, wait until the first has dried fully. After finishing, take off any temporary plant ties or canes that were utilised, as well as all plastic coverings from your plants and vegetation.
To keep your brushes in good condition for future use, wash them in warm, soapy water. White spirit could be required because outdoor wood paint is typically oil-based.
Before storing your fence paint and primer, make sure to properly label, tightly seal, and keep them out of direct sunlight and off the ground to prevent rust.